Finding space in your home can feel like an endless struggle. Whether it’s a pile of books, kitchen utensils, or tools in the garage, clutter has a way of creeping into every corner. That’s why building your own shelving units or storage solutions is both practical and satisfying. Not only do you save money, but you also get the exact setup you need. Even if you’re not a professional, simple projects can make a big difference. Before starting, make sure your space is ready. If your walls need attention, consider checking out small plumbing repairs services USA first, as water damage or leaks behind walls can affect your shelving.
Planning Your Shelving Project
Building shelves can seem intimidating at first, but breaking it into steps makes it manageable. Think of it as crafting something that will last—something functional that also adds personality to your home. The first step is understanding the type of shelving you need. Are you storing heavy tools or light décor items? Do you want open shelves for easy access or closed units for a cleaner look? Answering these questions will guide your choice of materials and design.
Choosing the Right Materials
Wood is the most popular choice. It is easy to cut, sturdy, and looks great in any room. Plywood, pine, or MDF boards work well. For a modern look, metal brackets paired with wood shelves create a minimalist style. You can even mix materials for a unique design.
Measuring and Preparing the Space
Start by measuring the space. Take note of height, width, and depth. Always measure twice to avoid mistakes. A common mistake is building a shelf too deep, which can make it awkward and impractical. Once measurements are ready, mark them on your wood with a pencil. This simple step will save you frustration later.
Tools You Will Need
Next, gather your tools. You will need a saw, drill, screws, level, measuring tape, and sandpaper. If you plan to paint or stain your shelves, keep brushes and wood finish handy. Simple hand tools can work for smaller projects, but a power drill and circular saw make the job faster and cleaner.
Cutting and Preparing Shelf Boards
Before cutting, decide on the shelf layout. For beginners, straight shelves are easier to manage. However, adding brackets or dividing sections can give more stability and style. Once cut, sand the edges for smoothness. Sanding prevents splinters and prepares the wood for painting or staining.
Installing Shelf Brackets
Installing the shelf brackets is the next step. Use a level to ensure they are straight. Mark screw holes carefully and drill pilot holes. This prevents the wood from splitting. Then, secure the brackets with screws. Once the brackets are set, place your shelf boards on top. Check the alignment again before fully tightening the screws.
Building Freestanding Storage Units
If you prefer freestanding units, you can skip brackets. Build a simple frame using four vertical supports and horizontal boards. Secure the boards with screws or nails, and reinforce with corner braces if needed. Freestanding units are versatile because you can move them around, unlike wall-mounted shelves.
Painting and Finishing
Painting or staining is optional but recommended. Paint adds a clean finish and allows your shelves to match the room. Staining brings out the wood grain for a natural look. Apply in thin coats, and let each layer dry fully. For high-use shelves, consider a clear polyurethane topcoat to protect against scratches and moisture.
Safety Tips During Installation
Safety should always be part of the process. Wear protective glasses when cutting wood and a mask if sanding. Keep tools organized to prevent accidents. If you have children or pets around, make sure unfinished shelves are out of reach until fully installed and secure.
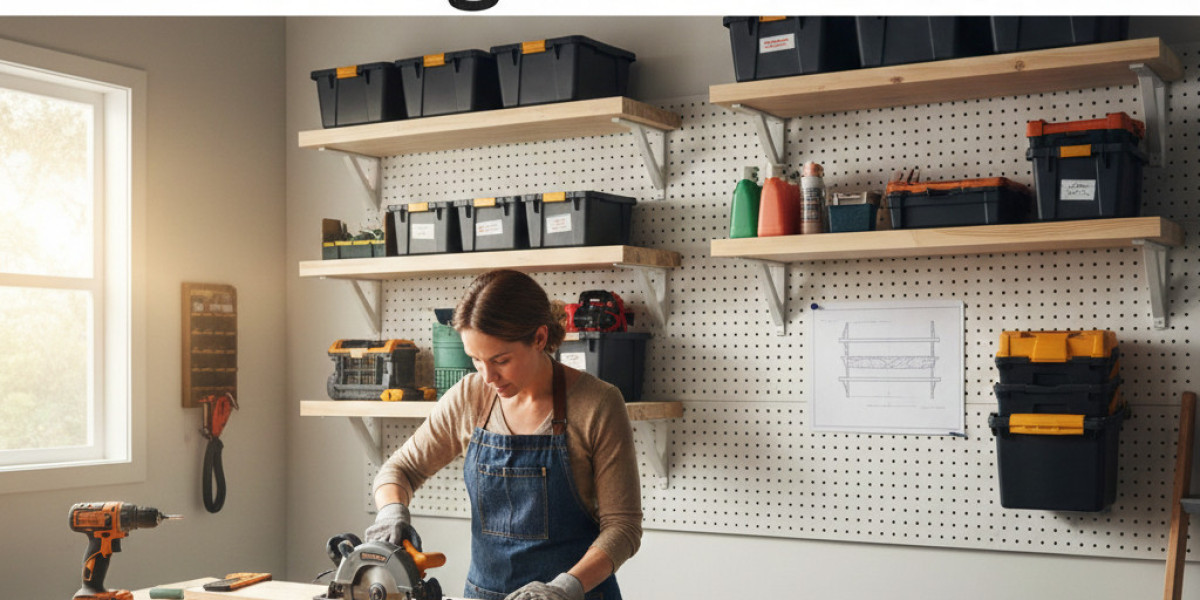
Additional Storage Organization Ideas
Storage solutions can extend beyond simple shelves. Consider adding baskets, hooks, or bins. They help keep smaller items organized and reduce clutter. For example, in a kitchen, small jars or containers fit neatly on open shelves. In a garage, labeled bins make it easy to find tools.
Maximizing Vertical Space
Another tip is to think vertically. Tall shelves maximize storage in small spaces. Wall-mounted units free up floor space and make rooms feel larger. A combination of tall units and low shelving provides flexibility and balance.
Creative Shelving Designs
If you enjoy projects, you can get creative. Floating shelves, corner shelves, or modular cubes allow for more personality. Floating shelves are simple yet modern. Corner shelves utilize often-overlooked spaces. Modular cubes are perfect for rooms that change function over time, like a home office or craft room.
Budget-Friendly Shelving Options
For those looking for a budget-friendly approach, recycled materials work wonders. Pallets, old crates, and leftover wood can be transformed into shelves with minimal cost. Clean, sand, and treat the wood, then assemble as desired. This method also adds a rustic touch to your space.
Shelf Maintenance and Care
Finally, maintenance is simple but important. Check screws periodically to ensure stability. Dust shelves regularly to keep them clean. For wood surfaces, occasionally wipe with a damp cloth followed by a dry one. Proper care prolongs the life of your storage solutions and keeps your home organized.
Final Thoughts
Building shelving units is more than just a home improvement task. It’s a way to take control of your space, reduce clutter, and add a personal touch to your rooms. The process itself can be enjoyable. Measuring, cutting, assembling, and finishing bring a sense of accomplishment. And the best part is seeing the difference it makes in daily life—finding things easily and having a space that feels organised.
Whether you’re building a single shelf for your kitchen, a set of units for your garage, or a modular solution for a home office, the principles remain the same: plan carefully, use the right tools, and focus on stability. Over time, your confidence grows, and projects that once seemed complicated become manageable.
For anyone in the United States looking to balance home improvements with professional help, services like Magic Touch Handy Man are available to assist with larger tasks or tricky installations. They can complement your DIY work, ensuring everything is secure, functional, and polished.
By following these steps, you can create simple shelving units or storage solutions that are both practical and stylish. With minimal tools, a little patience, and creativity, your home can transform into a space that feels orderly, inviting, and personalized.